Zapier Integration
Use Zapier to trigger Image View Zaps, each time a personalised image is viewed.
Using Zapier we're able to create events that happen when a personalised image is viewed.
For example, I may wish to add a note to a customer records in my CRM once they have opened an email, or visited a specific web page. With Zapier we can not only create such triggers, but also use the personalised data to further automate our flow.
Zapier is a FREE online service that connects two different online services together. Think of it as a universal translator of data.
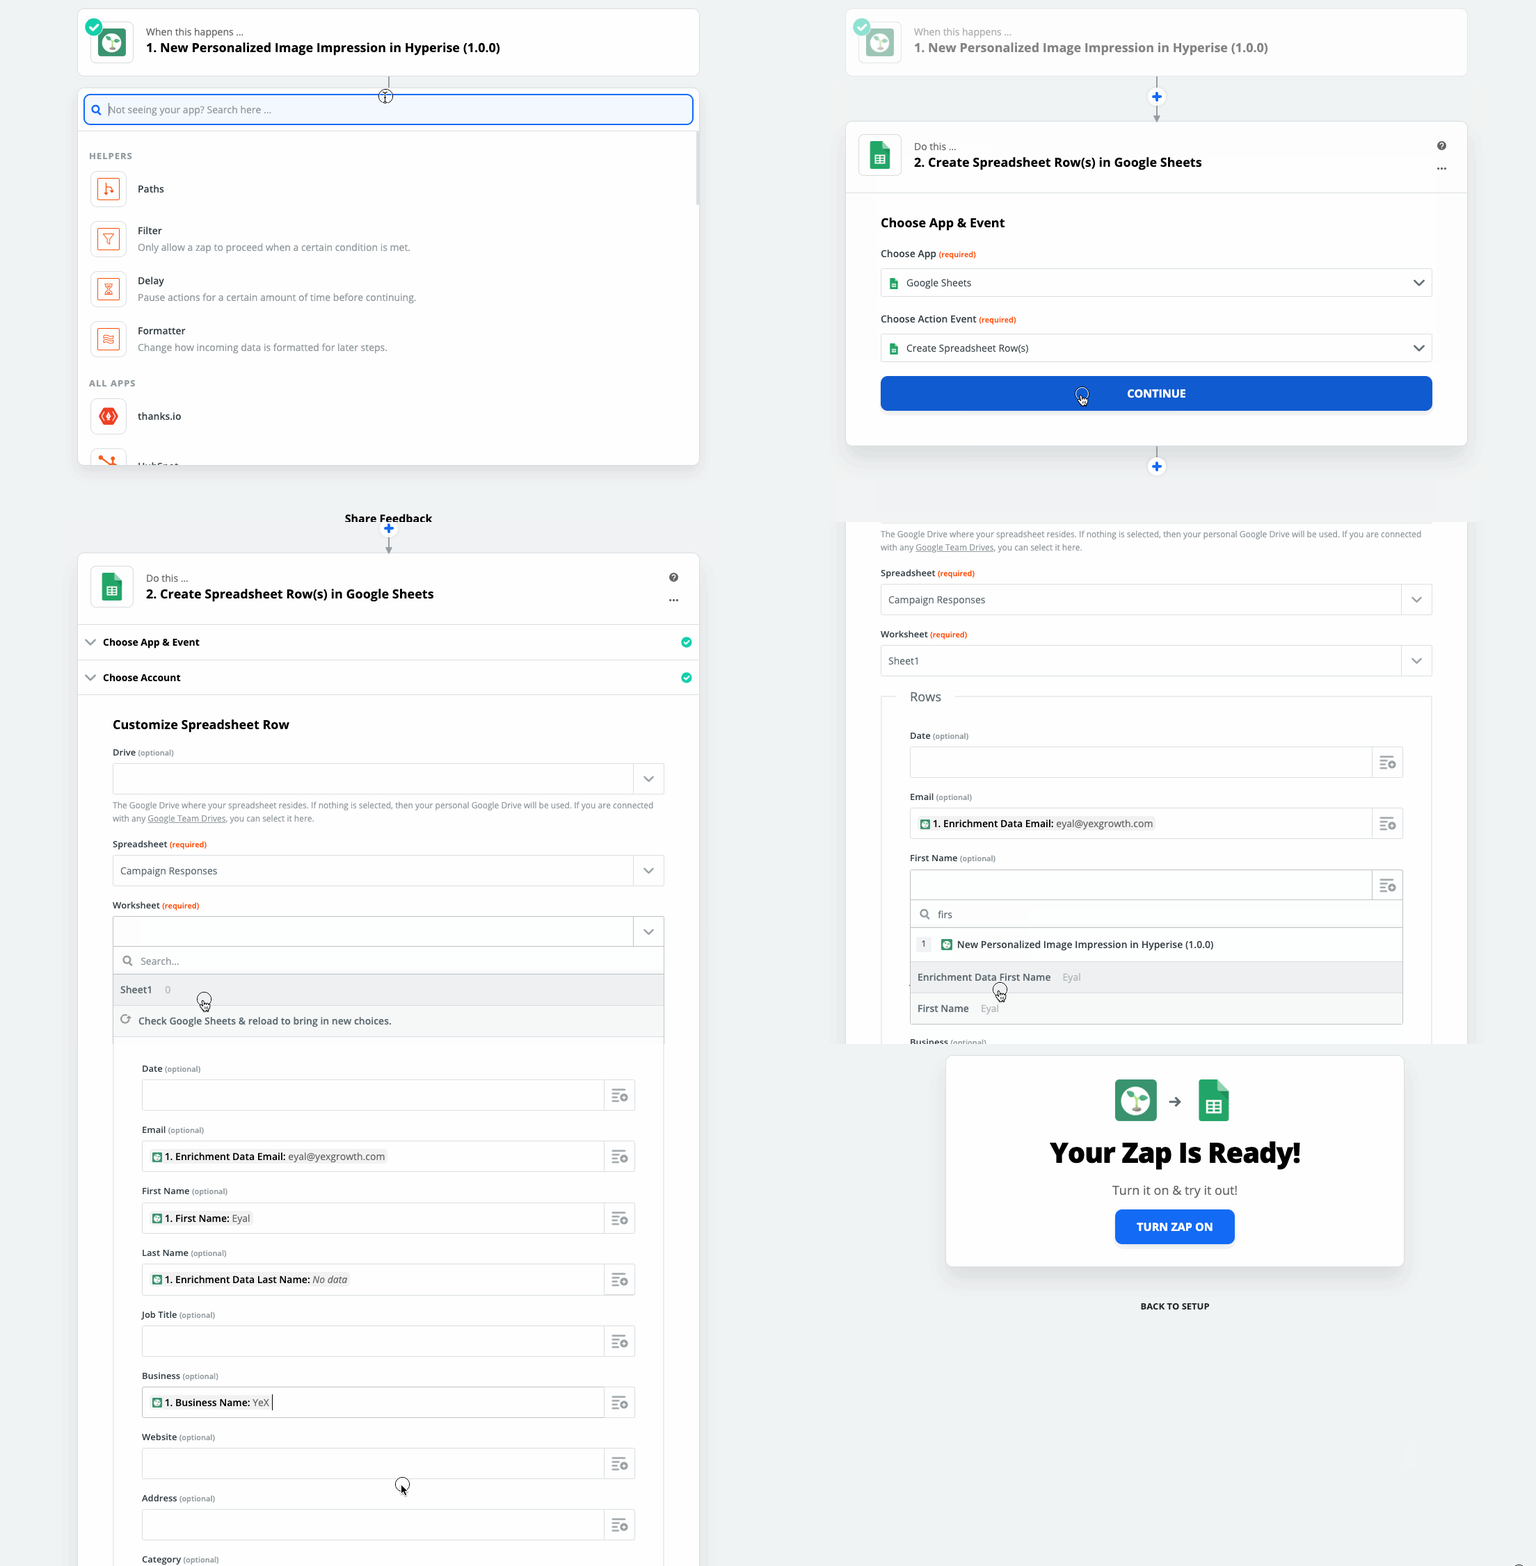
Because of the flexible nature of Zapier, the possibilities are virtually endless, for the purpose of this guide, lets follow the steps to connect an image view with a Google Sheet.
Get started with Hyperise and Zapier:
https://zapier.com/apps/hyperise/integrations
Step 1: Login to Zapier & add Hyperise.
Head over to the "My Zaps" page, to start building the Zap and click Make a Zap.

Choose the app you wish to trigger, in this case we're selecting Hyperise and then New Image View trigger.
This Zap will be triggered each time a new personalised image view is served from Hyperise. In addition to the trigger itself, Hyperise will push all the personalised data captured and the personalised image template being viewed.

Step 2: Grab your Hyperise API Token:
You only need to complete step 2 once, when first connecting your account. Head over to your Hyperise account and select Settings from the main menu, then API from within the Settings menu.

Step 3: Connect your Hyperise account.
If you're completing this process for subsequent Zaps, you will be able to select your existing settings from the account drop down, otherwise select + Add a New Account in Zapier:

This will prompt you to enter your Hyperise API token:

Step 4: Select the Hyperise image template.
Now your account is connected to Zapier, you'll be able to select the Image template used to trigger an action when its viewed, you can scroll the list, or search by name:

Once you've picked your template, thats the trigger side of the Zap complete, which will be denoted with a little green tick:

Step 5: Pick your Action
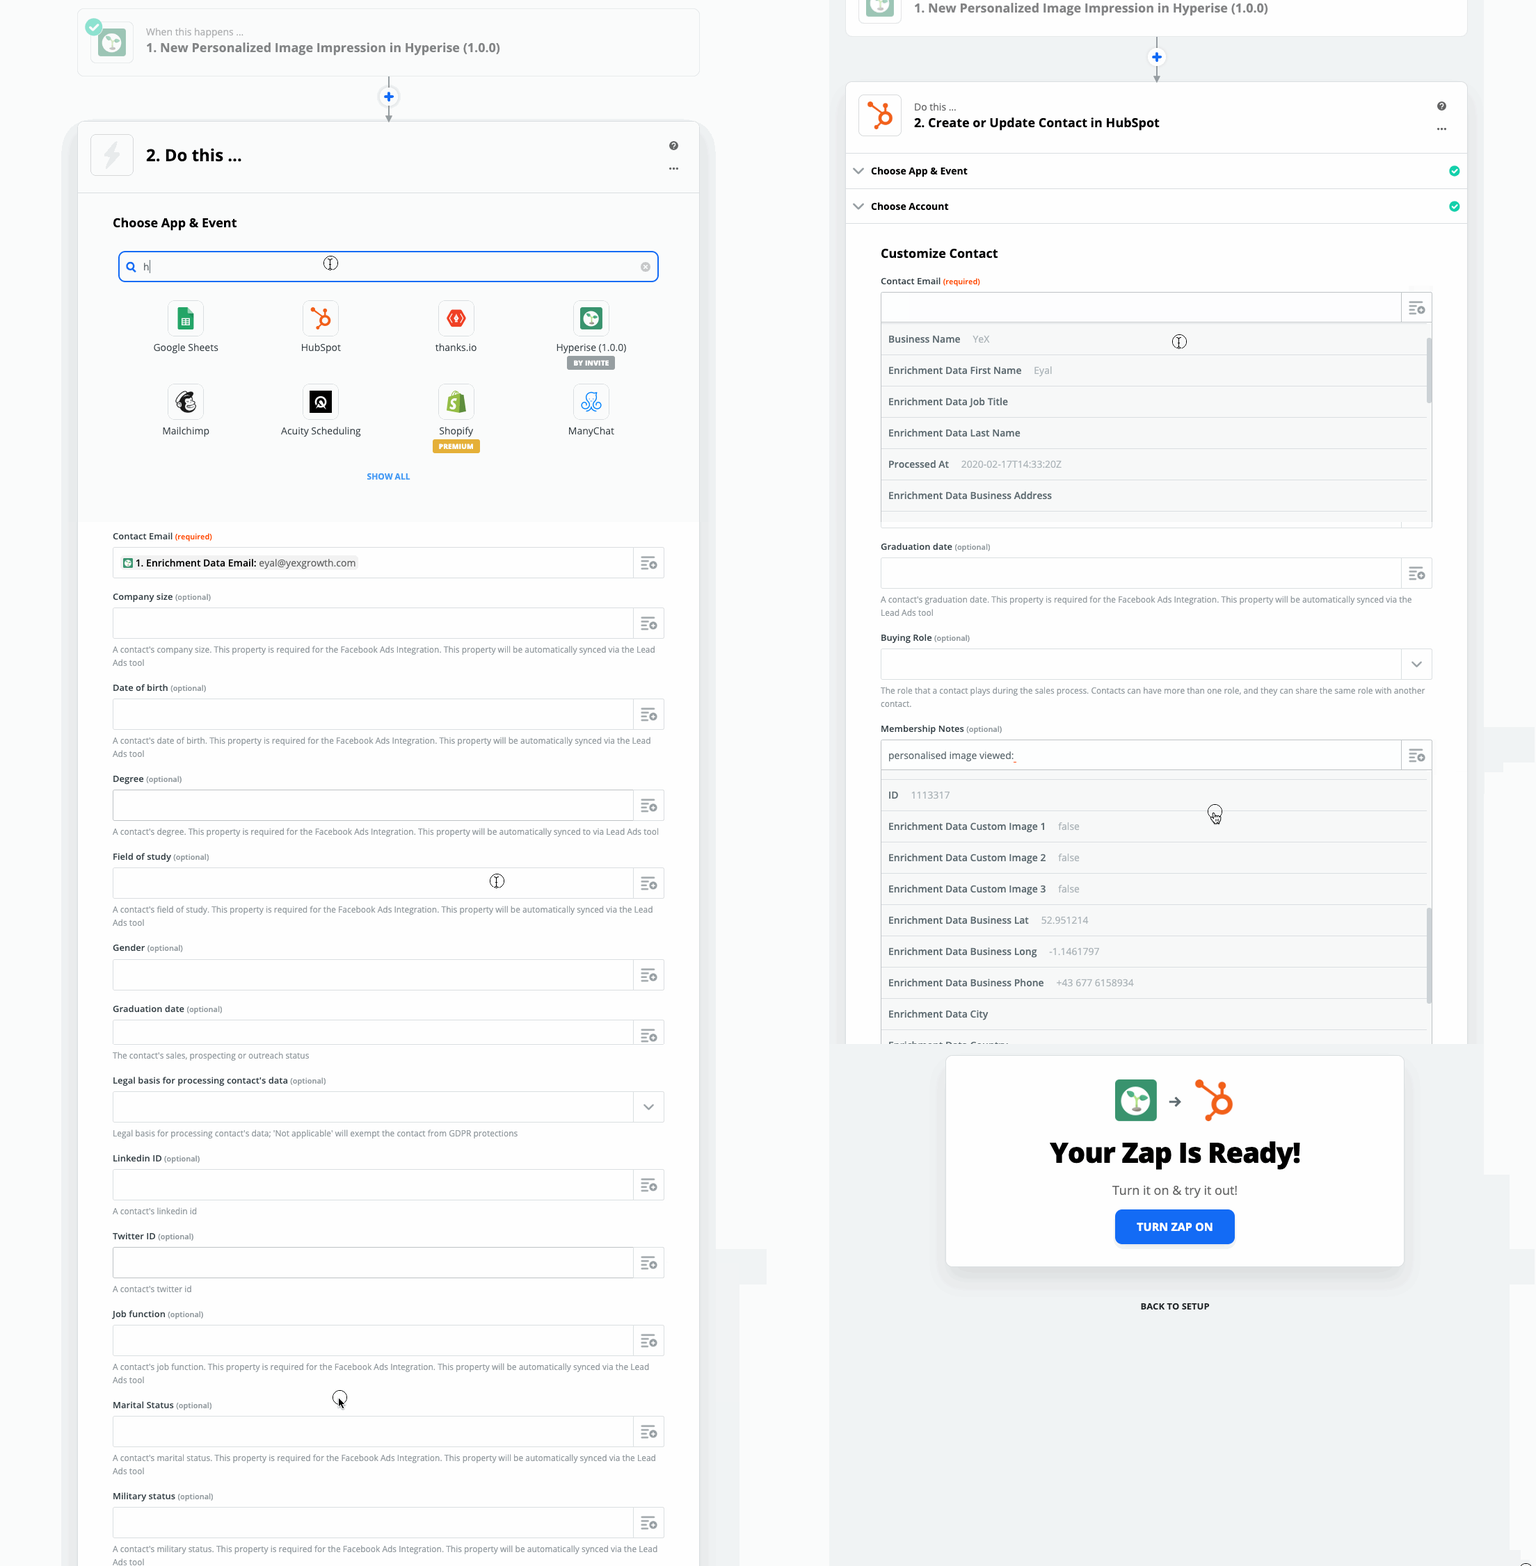
Now we have our Zap trigger, we need to pick an action to happen when the image view happens. Along with the trigger, the Zap will also include all the relevant personalisation data, this can be used to help identify the prospect, or to accompany the next step of the automation.
Step 5 Action ideas:
1. Update a CRM prospect record when they view an image

2.Add personalisation data to a Google Sheet

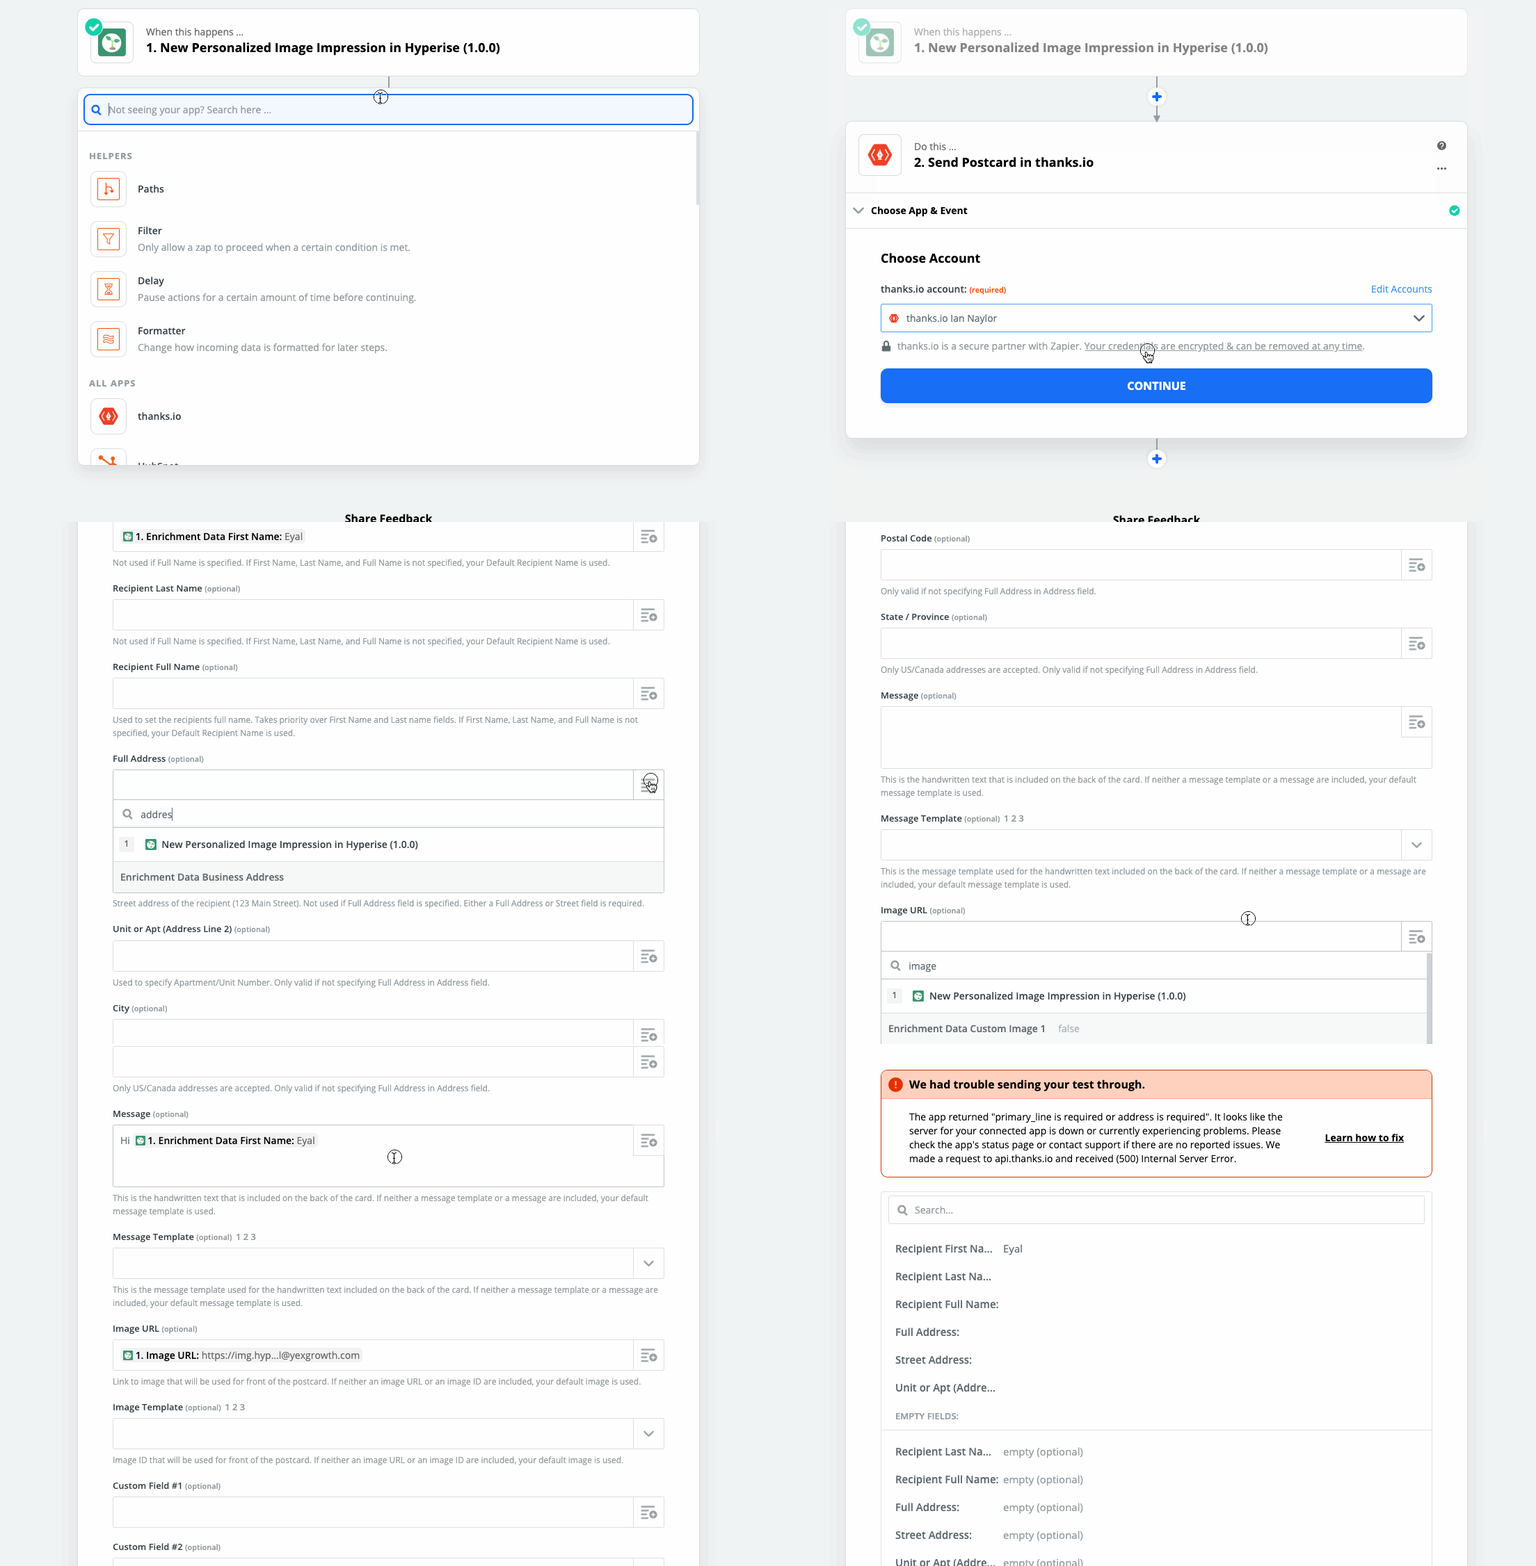
3. Send out an personalises postcard in the post

The above three examples are very simple two step Zaps, you can of course add further complexity and logic to these, for example finding a row in a sheet first, before updating. OR creating a filter, so you can define logic, or next steps based on a specific sequence.
Did this answer your question?
