CSV - Short Links
CSV Personalised Short Links
CSV Personalised Short Links
Using Personalised Short Links, you can provide a simple short link to your prospect, with embedded personalised Open Graph data, meaning when its shared socially, it will generate a personalised preview.
eg: https://lnk.your-domain.com/YE78H6i
^ you control the domain ^ unique to each link
For example sharing a personalised short link in LinkedIn will generate a preview like this:
This can also be replicated in other platforms, like this:

To create your personalised links, you must first add you custom link domain to your account.
To do this go to Settings > Custom Domain to setup. For further details on this process, check out the Link Domain Setup Guide.
Once you've domain is setup, you have a few choices to create the links. You can do this programmatically using our API (here's the Guide) or using a CSV file, which this guide will focus on.
Also coming soon support for adding via a Google Sheet, or Zapier or Integromat....
How to create Personalised Short Links using CSV
1) Edit the image you want to use for the personalised preview
2) Select Integrations and select CSV
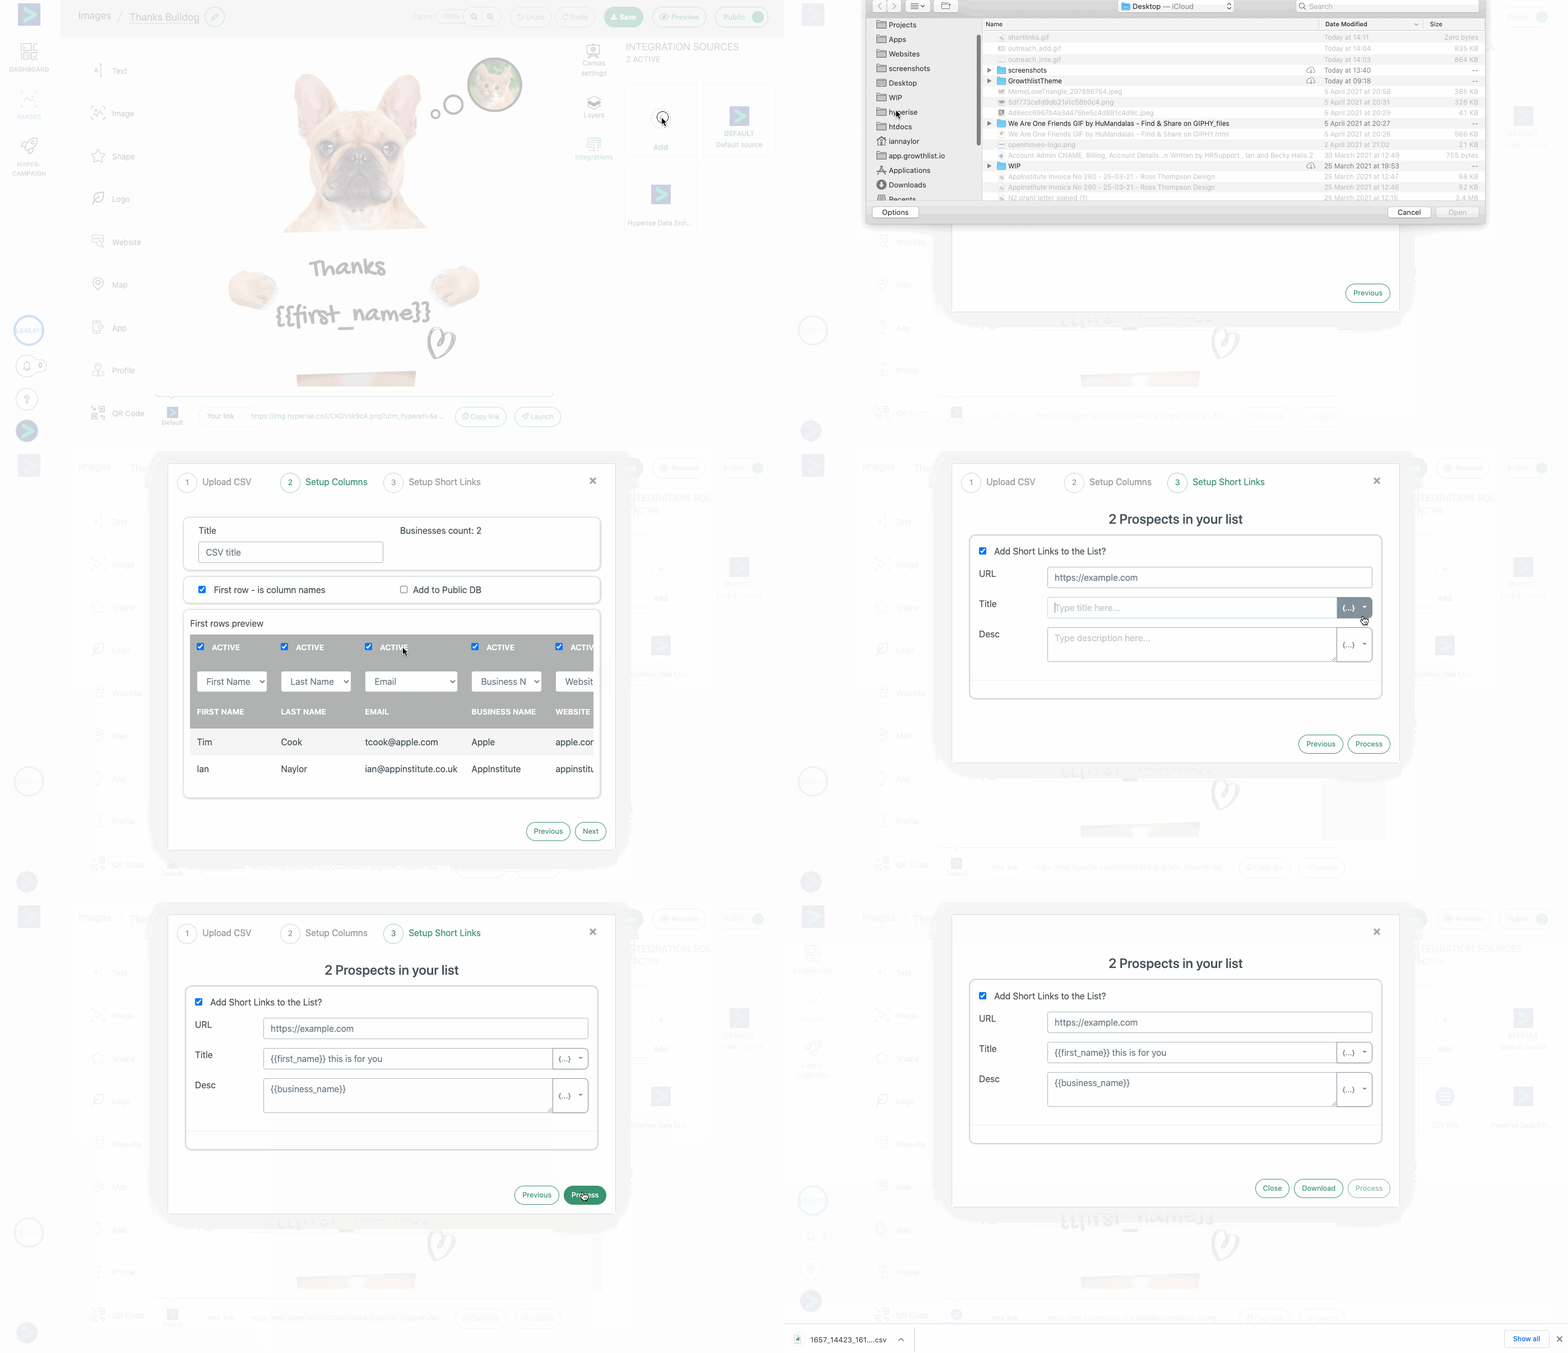
3) Upload your CSV file and set OpenGraph preview title and description
4) Process and Download your completed CSV

Pretty simple huh? Lets breakdown these four steps...
1) Edit the image you want to use for the personalised preview
When you share the link, 3 or 4 details will be shown, the image being the most prominent, so choose your image well, with appropriate personalisation to trigger the pattern interrupt and engage your prospects.
2) Select Integrations and select CSV
From the Integrations tab of your image, select Add and filter the results by type CSV...
3) Upload your CSV file and set OpenGraph preview title and description
Upload your CSV prospect data, if the column names used match the Hyperise tags, they will be paired automatically, otherwise for each column you can match to the appropriate Hyperise tag.
Once all required columns are matched, continue to the Open Graph link information.
Here you can control the shown link title and description, adding in personalisation tags.
4) Process and Download your completed CSV
Once the CSV has been processed, you will receive a notification within the app and your new CSV will be ready to download, either direct from the notification, or within the image > Integration section.
This CSV can now be uploaded to your outreach platform of choice, and then use the link and image fields in the CSV to dynamically show in your message templates.
Did this answer your question?
