Make.com Email Integration
Make.com Email Integration
Being able to reach-out to your prospects across multiple channels can significantly help drive engagement and conversions.
Using automation tools like Make.com makes life significantly simpler, connecting different platforms and work flows you use, and also performing simple tasks, like sending emails.
Being able to add personalised images to emails being sent out via Make.com is super simple and can help more than double your emails engagement and click through rates.
HOW TO IMPLEMENT THIS YOURSELF
Spoiler Alert: to achieve this, we’re using two different tools, if you don’t have Make.com and Hyperise, then there is going to be some additional cost to achieve this!
Step One:
For the purpose of this guide I’m using Make.com, you could also use Zapier if you prefer, but as Make.com is about quarter of the price of Zapier, I prefer to stick with this
Create a new Scenario in Make.com, select the starting module, in this example we're using a Webhook, that will send an email when called.

Once the Scenario is created, select the Webhook option, and give it a meaningful name (ie in this case Expandi, as that is what we’re linking to). Now finally copy the webhook address provided
Step Two:
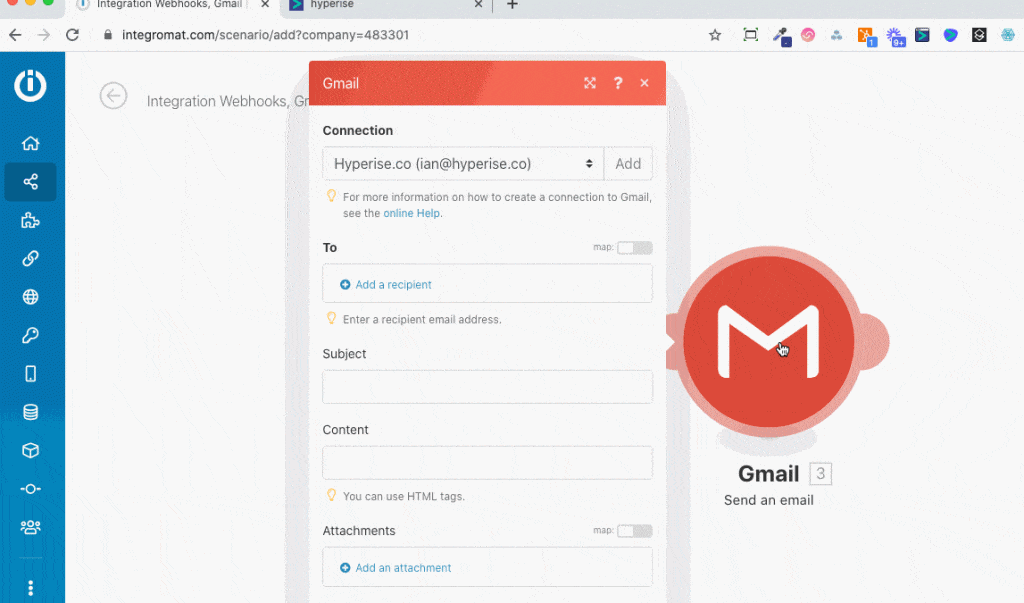
Now we can add a second module, that will send the email for us.
At this point you could add a CRM or email platform integration, and send the prospect to there, and then send the email from an automation trigger in that platform.
I prefer to keep things simple, so I send the email direct from Make.com, they have both a standard SMTP email client module and a GMail module.

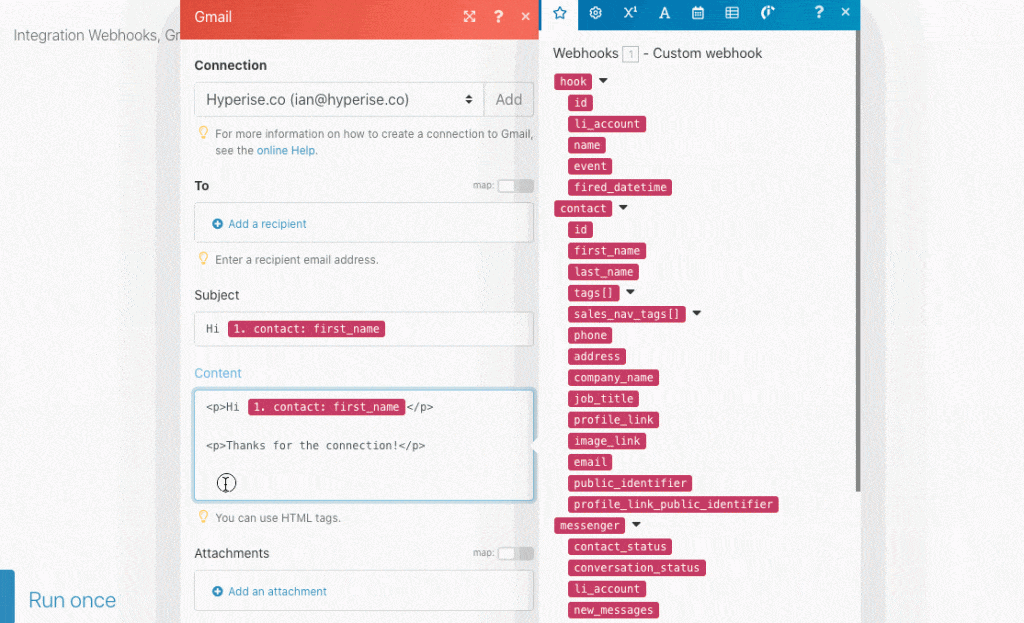
You can now define the email content, adding in personalisation tags and images as you go.

Step Three:
Now we can add a Hyperise image to our email, first head over to your Hyperise account and select the image you want to use, add the Make.com Email integration and copy the image code.

Once you’ve copied the image URL, head back to Make.com, to add it to your email content.

First paste in the image code copied from the previous step, into the email content area, now add the tags needed for the image, from the list of data options sent from the webhook.
The image code will show all the required data fields needed to complete the personalisation.
Step Four:
Final step is to save and turn on your new Make.com automation Scenario.
Once done, thats it! Totally set and forget, now each new connection you have on LinkedIn, who has an email available on there profile, will get a lovely personalised welcome email.

Did this answer your question?
