Send Personalized Postcard with ClickSend integration
Clicksend Integration - Send Personalised Postcards, linked to Personalised web, using Hyperise, Zapier & ClickSend.com
Using QR Codes, personalised to the recipient, can be a great way to connect offline and online campaigns.
For example sending a prospect or existing customer a postcard in the actual mail, with a handwritten message on the back and a personalised image on the front, with an actionable personalised QR Code - that would could be a standout campaign.
This image paints a good argument for trying offline postcard campaigns.

Such a campaign would seem difficult or time-consuming, definitely costly to pull off, before now... 🙂
In just three steps this is now possible with Hyperise and ClickSend.com
Here are the three steps in summary
- Create your front and back postcard images and using Hyperise to personalise and add QR code.
- Personalise your campaigns landing page with the Hyperise web personaliser.
- Setup a Zap in Zapier to print personalised postcards via ClickSend when you trigger an event.
Now lets break these steps down into digestible chunks...
1. Create Postcard Image in Hyperise
Creating a personalised image using Hyperise is straight-forward, we've added postcard front and back templates in your Hyperise image library, selecting these as your canvas background image will detail print areas and image dimensions.

NB: Once you've created your front and back designs, you can remove the guide images from the canvas, to give the final design.
Using the built in personalised QR Code generator it's easy to create scannable QR codes, that will take the prospect to a personalised version of your website.
Add the QR Code to your image and set the URL to visit when scanned. Hyperise will automatically append tracking codes to this URL, to personalise to each prospect/recipient.

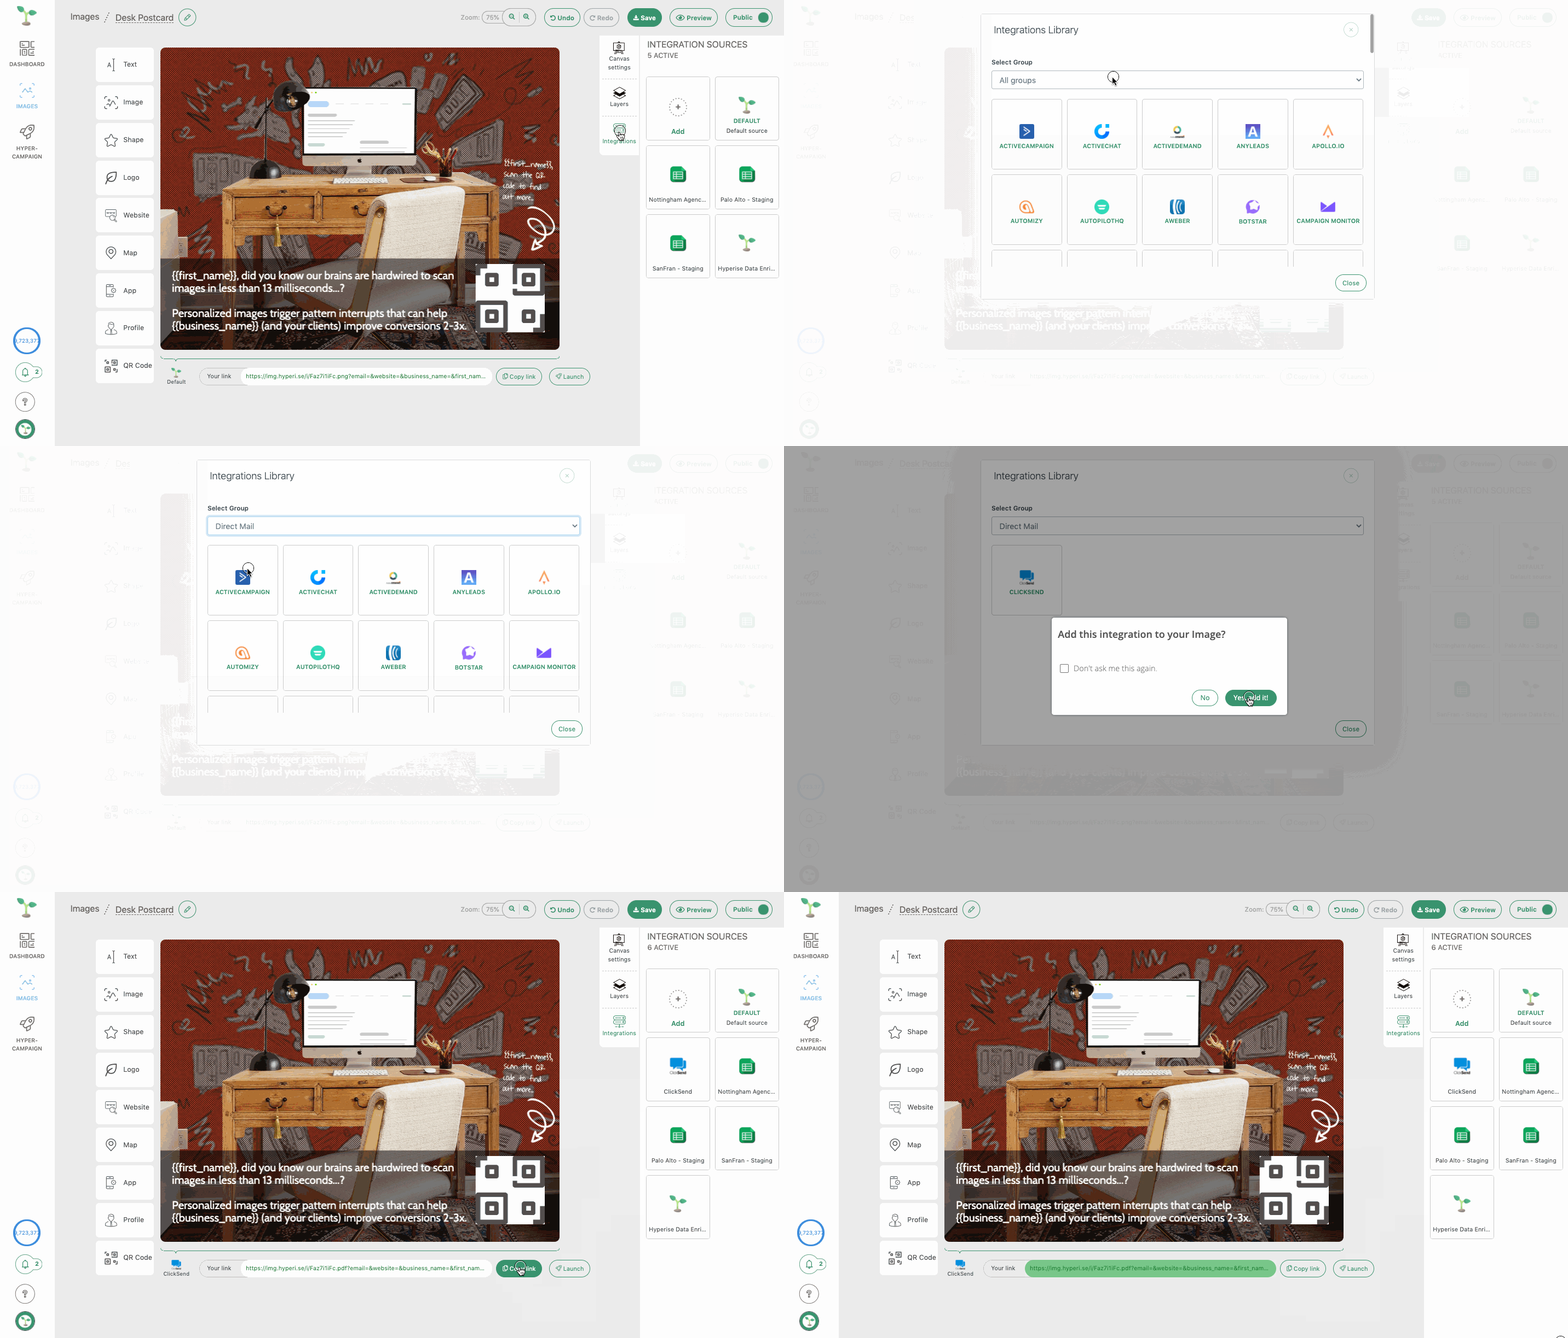
Now add the ClickSend integration to your finished image, this will change the output from PNG to PDF, now you can copy the Link for each design and add them in step three.

We'll use the image URLs for both of these in step three, using with ClickSend.
2. Setup personalised web page
This is an optional step, if you including a personalised QR code in your postcard design. If you don't want to use a personalised website in your campaign, you can skip this. (Although it is very effective at increasing website conversions!)
The Hyper-Campaign web snippet enables full website personalisation, we've covered how to implement this on your own website in this guide here:
https://support.hyperise.com/hyper-campaign/personalising-website-content-images
Once setup, whenever the page is called with a value set to the hype_ref parameter, personalisation will be shown, in all other cases the fallback defaults will be shown.
As we've set each prospects QR code to embed their unique ID in the hype_ref parameter, each QR code scan will take the prospect to their own personalised web page.
3. Print Personalised Postcards
Now we can leverage ClickSend.com to print and send out the postcards.
To connect the data along with the personalised postcard image to ClickSend we use Zapier. Zapier is a FREE online service that connects two different online services together. Think of it as a universal translator of data.
A sample use case would be sending thank you cards automatically to every new contact added in Salesforce or a new row to a Google Sheet...
For this example we are going to connect Google Sheets with ClickSend.com so that when a new row is added to a sheet it will trigger a postcard to be sent.
Step 1: Login to Zapier & connect your ClickSend.com account.
Step 2: Set up the trigger event, which in this case is "adding a new row"
Step 3: Choose your account, pick the spread sheet to use & finalize the data.
Step 4: Connect the data to send to ClickSend.
Within the ClickSend zap, select the Send Postcard event:

Complete all the required data fields in the ClickSend Zap, selecting data from the trigger Zap, in this example the Google Sheet:

For the postcard design we need to add a front and back design, the first URL to be added will be the front and the second URL the back.

Simply paste in the image URL from Hyperise and add the data tags from the Sheet zap to the image URL:
Thats it, once you have completed the Test & Continue your Zap is now ready to send personalised postcard whenever your Sheets has a new row of data added to it!
Did this answer your question?
